Deploy a Docusaurus project to GiHub pages
To make your website available and accessible to users on the internet, you need to deploy it. This document shows how to configure and deploy a Docusaurus project to GitHub pages, a hosting service provided by GitHub.
Prerequisites
- Install Docusaurus.
- Get a GitHub account: To deploy your project to GitHub pages, you need a GitHub account.
- Install a code editor (for example, Visual Studio Code): You need a code editor for working with your Docusaurus project.
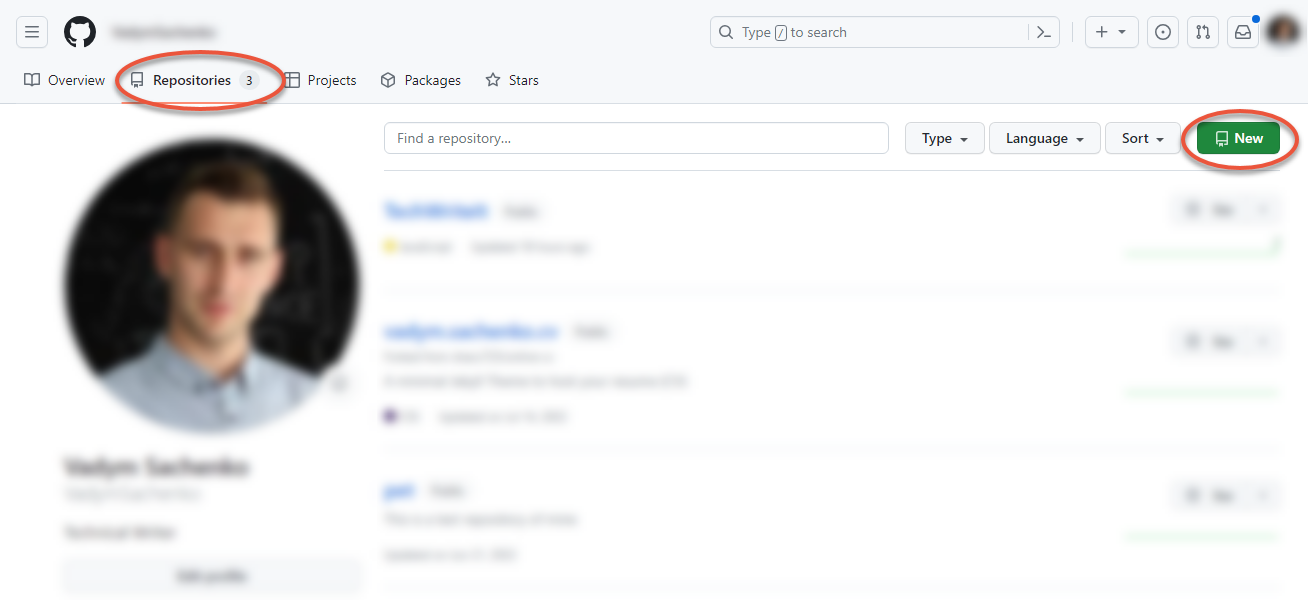
Create a repository
On GitHub, create a new repository for your project
- In the Repositories tab, click New.
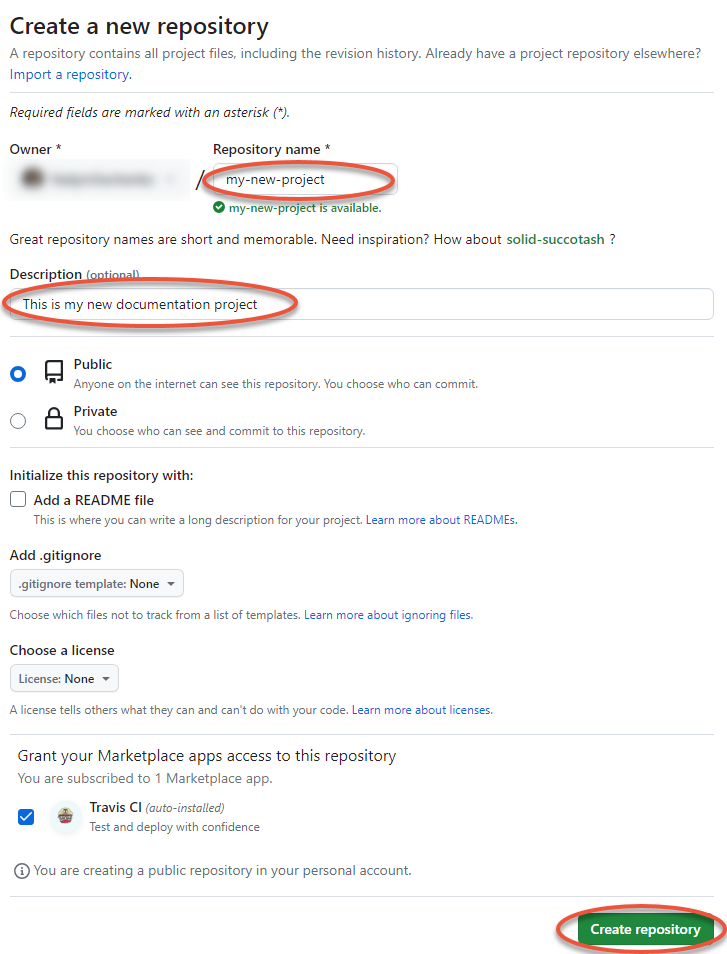
- On the Create a new repository page that opens, do the following:
- For the Repository name, enter a name for your new repository—for example,
my-new-repository. - Optional: For Description, enter a description of your project.
- Click Create repository. This creates a new repository and redirects you to your new repository's page.
- For the Repository name, enter a name for your new repository—for example,
Configure docusaurus.config.js
The docusaurus.config.js file serves as the central configuration file for your Docusaurus project, allowing you to tailor your documentation website to your specific needs and preferences.
By modifying this file, you can control many aspects of your site's behavior, deployment, and appearance.
For more details about docusaurus.config.js, in the official documenatation, see docusaurus.config.js
To be able to deploy your project, you need to adjust docusaurus.config.js:
- In your text editor, open
docusaurus.config.jsand adjust theurl,baseUrl,organization,projectName, anddeploymentBranchvariables as follows:
const config = {
  ...
  url: 'https://github.com',
  baseUrl: '/REPOSITORY_NAME/',.
  organizationName: 'USER_NAME',
  projectName: 'REPOSITORY_NAME',
  deploymentBranch: 'gh-pages',
  ...
}
Replace the following placeholders:
REPOSITORY_NAME: Replace it with the name of the repository you created in the Create a repository for your new project step.USER_NAME: Replace it with the name of your GitHub account.
Initialize and set up your Git repository
- Initialize a new Git repository in the current directory and stage and commit changes:
git init
git add .
git commit -m 'first commit'
- Rename the default branch to
main:
git branch -M main
- Add a remote named
originand specify your GitHub repository URL:
git remote add origin https://github.com/USER_NAME/REPOSITORY_NAME.git
Replace the placeholders:
REPOSITORY_NAME: Replace it with the name of the repository you created in the Create a repository for your new project step.USER_NAME: Replace it with the name of your GitHub account.
- Push the local
mainbranch to theoriginremote:
git push -u origin main
Deploy your project
Deploy your project to GitHub Pages:
GIT_USER='USER_NAME' yarn deploy
Replace USER_NAME with the name of your GitHub account.
If you get the bash: GIT_USER: command not found error when running GIT_USER='USER_NAME' yarn deploy, try this command instead:
export GIT_USER=`USER_NAME`
yarn deploy